
Water-wise and cheap to set up, propagating by cutting has become easier than it ever was before!

As we prepared to move house, I found myself dismayed by the number of rare or difficult-to-get plants that were in the ground. I wanted to take them with me!
The answer?
Propagation by cuttings!
This sounds like a simple solution but many of the Australian plants that I wanted to propagate are difficult to say the least. I watched as each time, the cuttings perished without striking.
I was particularly keen to propagate my Lemon Myrtle (Backhousia citriodora) tree as it had a lovely habit and wonderful leaves. The crop was not matched by the one I had in a pot. Lemon Myrtle are notoriously difficult to propagate from cuttings and extremely variable from seed propagation. I wanted a clone!
In the last few years, I must have taken more than one hundred cuttings of the Lemon Myrtle and none survived. Other plants were hit and miss with only a small portion of the Australian native trees striking. The Australian coleuses were the exception with almost 100% success.
Some of the cuttings survived initially and appeared to be on their way to striking until we had a few hot days. On those days I sprayed and watered but it wasn’t enough and they eventually wilted and died.
Things were getting desperate. I knew that cuttings would also be hard to transport in their little pots.
As I searched for ways to improve my success rate with the trees, I remembered a Gardening Australia episode that used multiple pots to combine cuttings. You can read about that here.
It was a great idea, but it still wouldn’t help with the watering in my hot climate.
I flirted with the idea of using Olla pots that are made of terracotta. When buried in the soil, one simply tops them up through the opening above ground level and the porous terracotta slowly leaks water into the surrounding soil.
As I researched Olla pots I was dismayed at the prices and at the fact that I would have to get them shipped from elsewhere. One day my eye fell on the small terracotta pots in my greenhouse and inspiration struck!
I tried three different ways, but all used the same principle.
How I take a cutting
- Select a section of plant that you can cut — I usually try for about 20cm (6 inches) long. (Some species prefer hardwood, some soft new growth and others semi-hardwood. When trying a plant for the first time I try to take a mix so I can figure out which works best for that plant.)
- Cut below a growth point or node which will probably be where a leaf or stalk is already growing from the stem you are cutting. Try to cut so that there is still an inch or so of stem under the node.
- Remove any flowers or fruit so that the plant can put the energy into developing new roots.
- Remove leaves and stalks carefully from all but the top of the cutting. Leave some so that the new plant can still photosynthesise.
- With a sharp knife or pair of scissors, slice the stem diagonally from the lowest growth point or node to the base of the cutting.
- Dip into rooting hormone. The powdered root hormone has given me the greatest success. The gels and honey have never worked well for me.
The way with a potted plant and soil
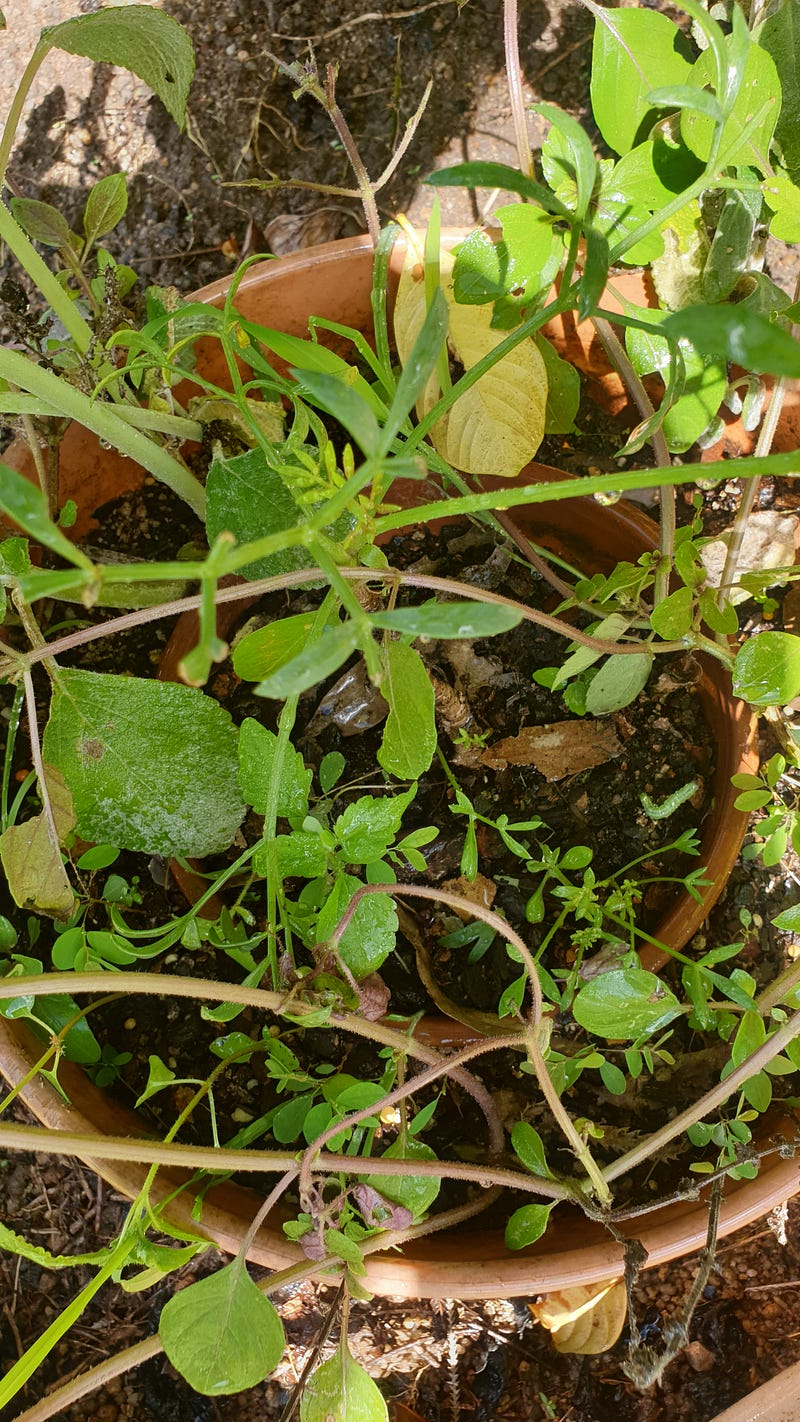
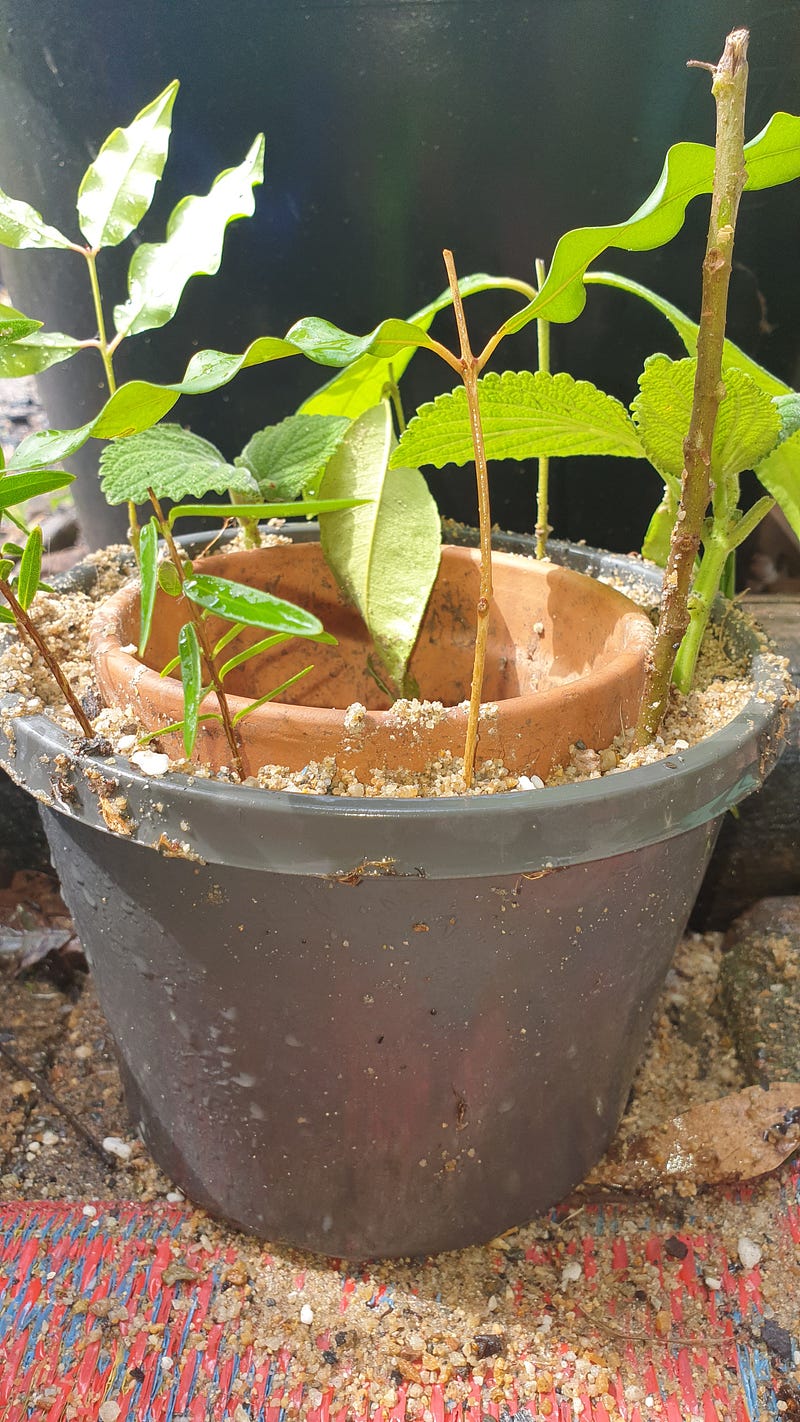
The first thing I tried was taking a plastic pot and filling the bottom with potting mix. I then placed another pot that already contained a plant into the middle and filled the plastic pot with more soil around it, packing it down well.
I took cuttings. I used an old stick to poke holes into the soil before placing the cutting in the soil as deep as I could. I gently backfilled and then waited.
While I waited I made sure that as soon as the centre plant’s soil dried out, I topped it up.
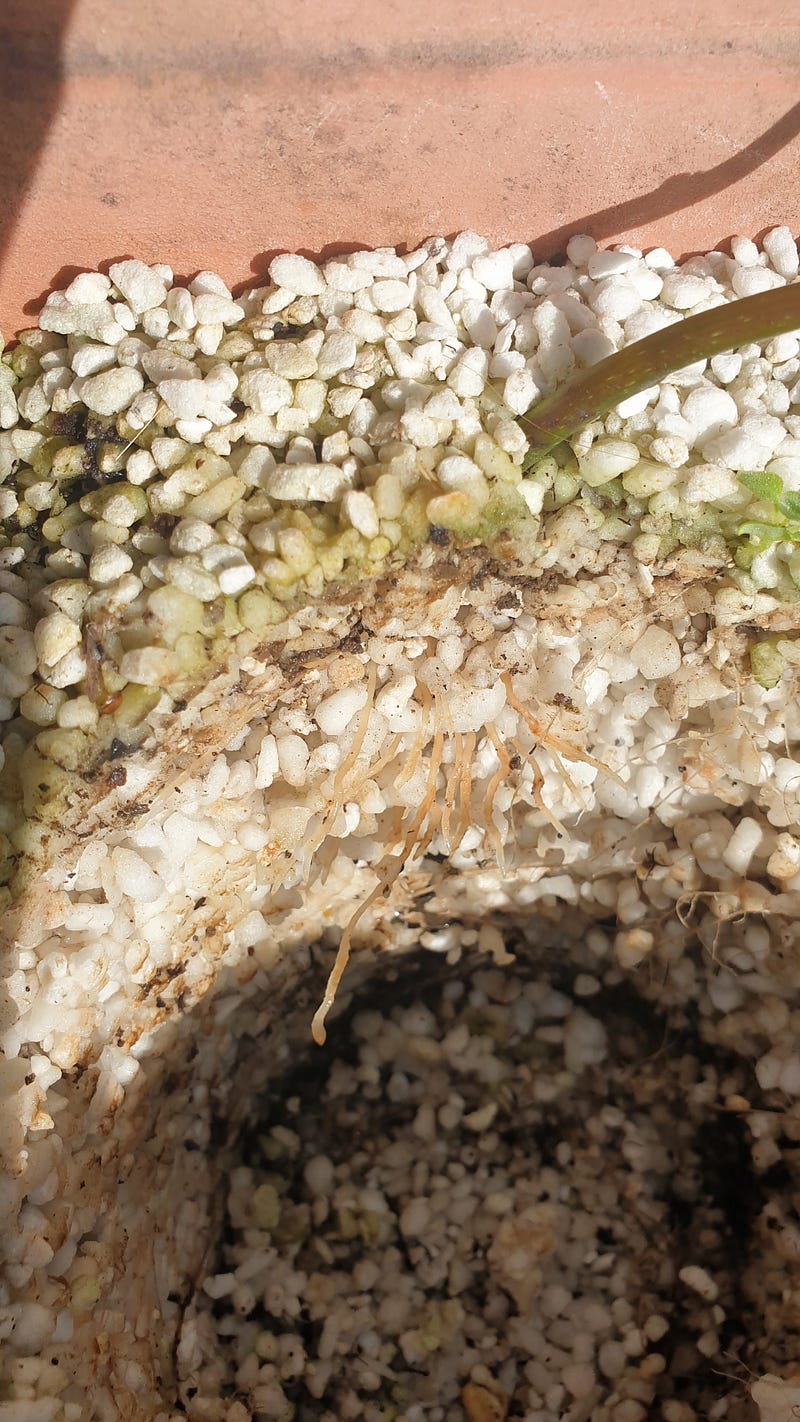
Every so often I carefully removed the middle pot to inspect the soil for signs of root growth. Eventually, I was rewarded!
VERDICT
This was a great success for Coleus and herb cuttings but didn’t help the trees.
The way with terracotta pots and propagating sand
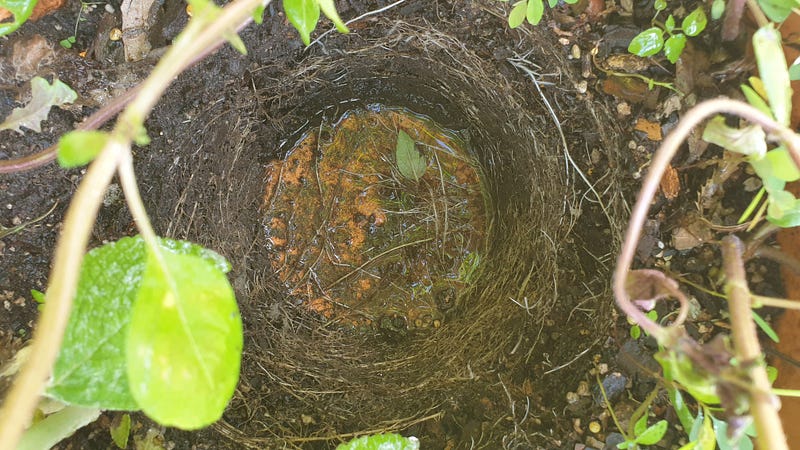
This time I did almost the same thing except instead of soil I used propagating sand and instead of a potted plant, I used an empty terracotta pot. To make sure that the water leaked out slowly, I used kitchen grade silicon to fill the hole in the bottom of the pot.
The great thing about the pot being empty of plants and soil is that you can clearly see how much water is left. I topped it up whenever it emptied and waited.
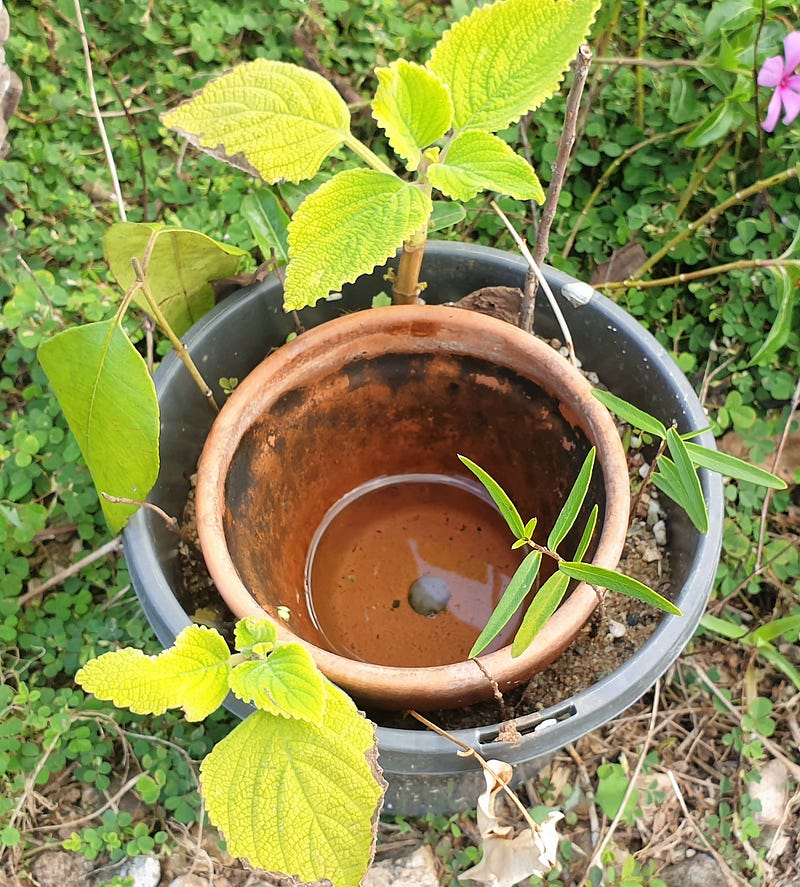
Every so often I gently remove the inner pot and inspect the propagating sand for root growth.

VERDICT
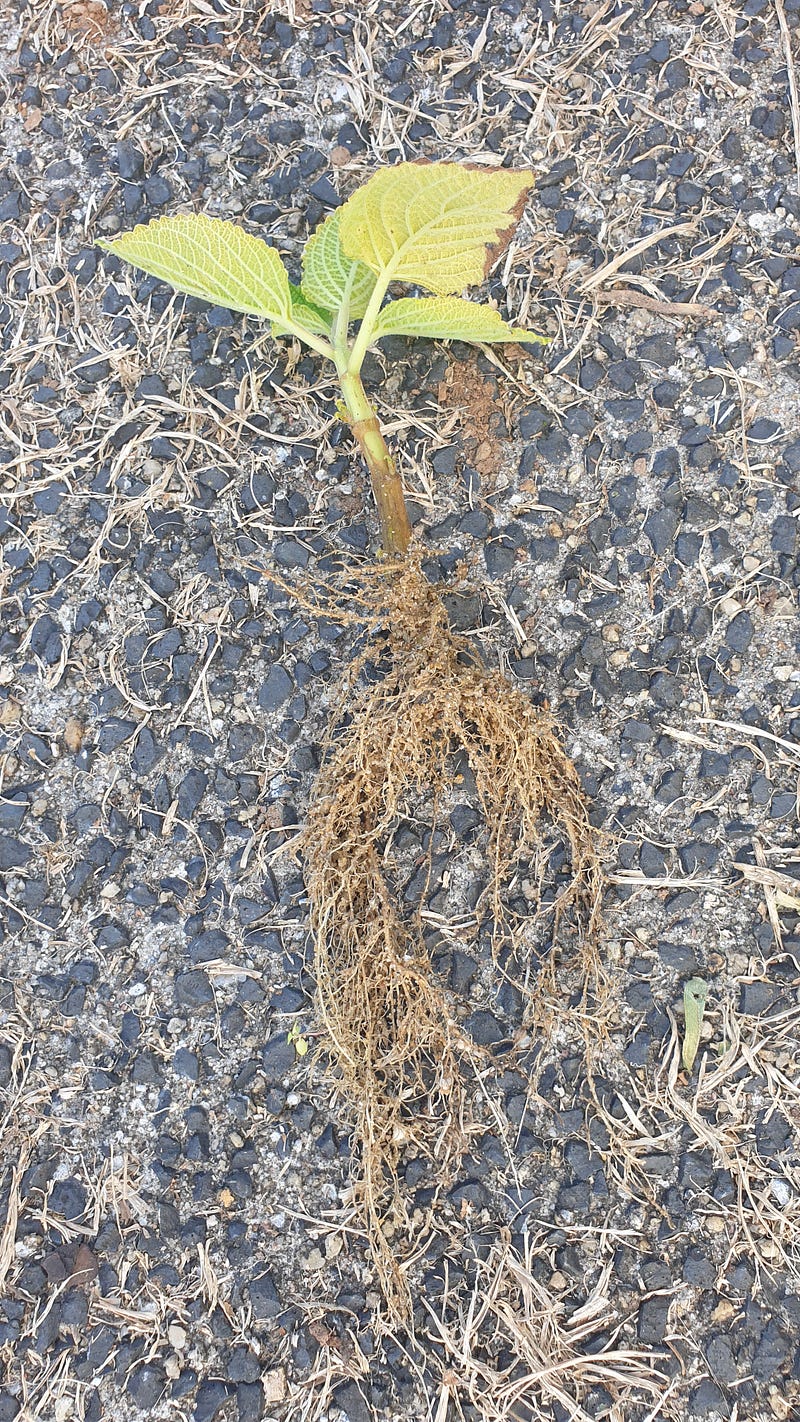
This has been the most successful method for me. One of my Lemon Myrtle cuttings is alive and well after about 10 weeks using this method! I still can’t see the roots but other cuttings have already been removed with lovely roots and painstaking care.

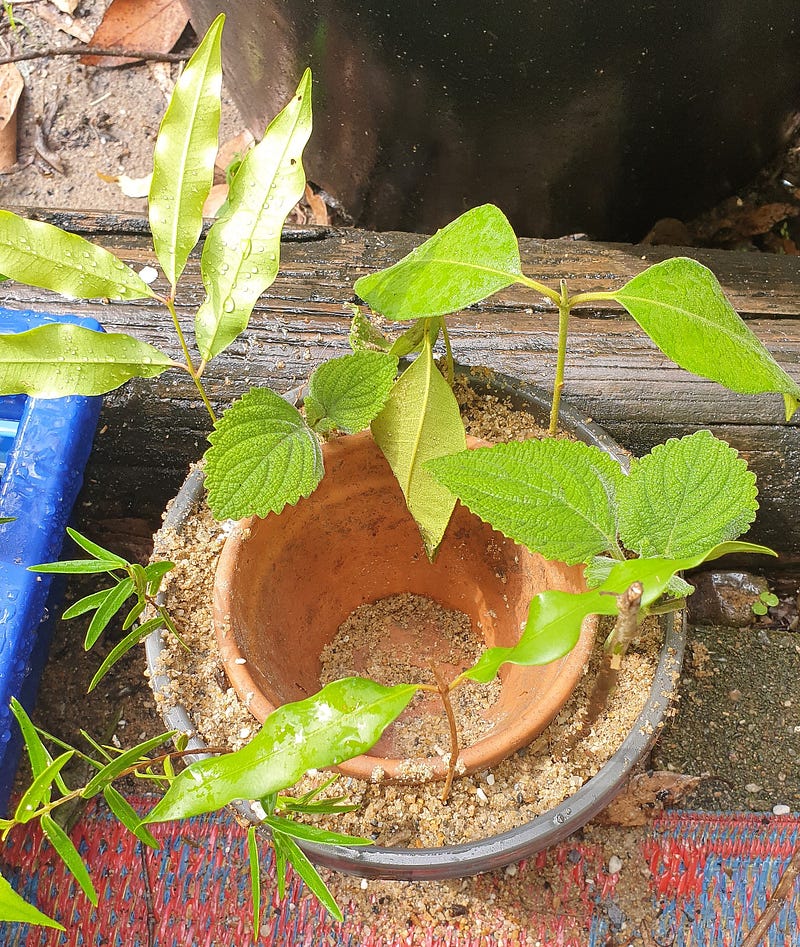
The way with terracotta pots and perlite
I decided to try this because I had run out of propagating sand and I didn’t want to buy more that would need to move with us or be left behind. I did have perlite. So I followed the same methods as the propagating sand but simply used perlite instead.
VERDICT
This was more successful than the soil but not as successful as the propagating sand for most cuttings.
CONCLUSIONS
- Soil is fine for softwood cuttings from Coleus and herbs.
- Propagating sand is the best medium for thirsty cuttings of hardwood and semi-hardwood.
- Perlite is the best medium for softwood and semi-hardwood cuttings from plants that might rot in a wetter environment.
- Using the terracotta is a great way to keep cuttings moist without constant watering. Also, terracotta regulates the water, transferring faster to dry soil and slowing down when the soil is wet.
- From now on, I will always use these methods when propagating from cuttings.
This story was originally published on Medium on July 18, 2022 by the same author.
Like to motivate Jane to keep writing? Buy her a coffee using this link.
